Citrix Content Collaboration single sign-on configuration guide for ADFS 3
Prerequisites to installation
To set up Citrix Content Collaboration to authenticate with Active Directory Federated Services, you need the following:
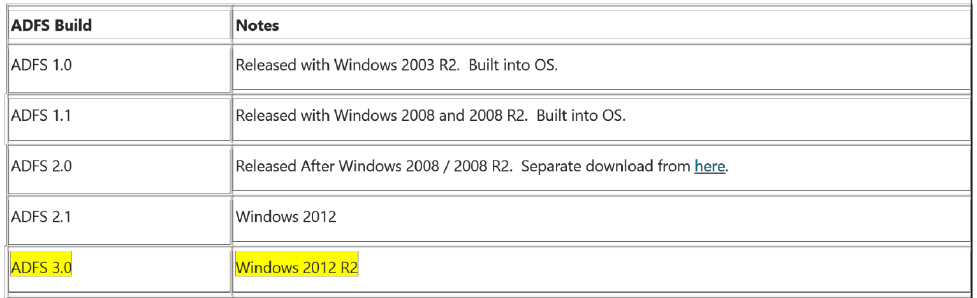
- Windows Server 2012 R2
- A publicly signed SSL Certificate from a CA. Self-signed and unsigned certificates are not accepted.
- An FQDN for your ADFS server
- Access to an administrator account within Citrix Content Collaboration with the ability to configure single sign-on.
Note:
To provision users from your Active Directory to Citrix Content Collaboration, reference the User Management Tool installation guide.
ADFS 3.0 (Role-based install)
-
You cannot download Microsoft Active Directory Federated Services 3.0 separately. You must use a Windows 2012 R2 server for this version.
-
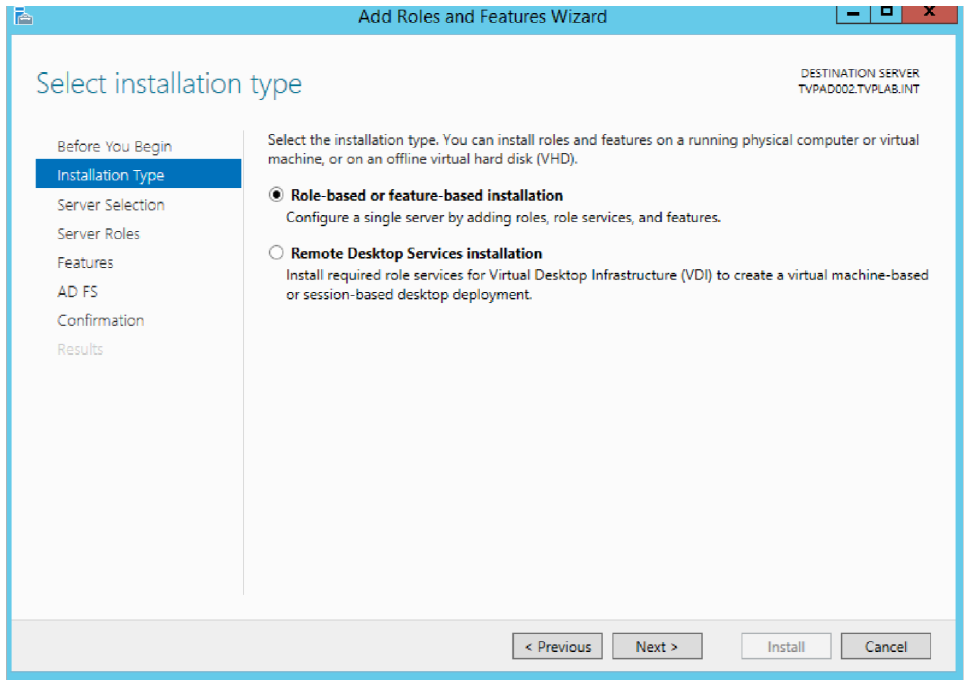
Install the Role-based or featured based installation. Click Next.
-
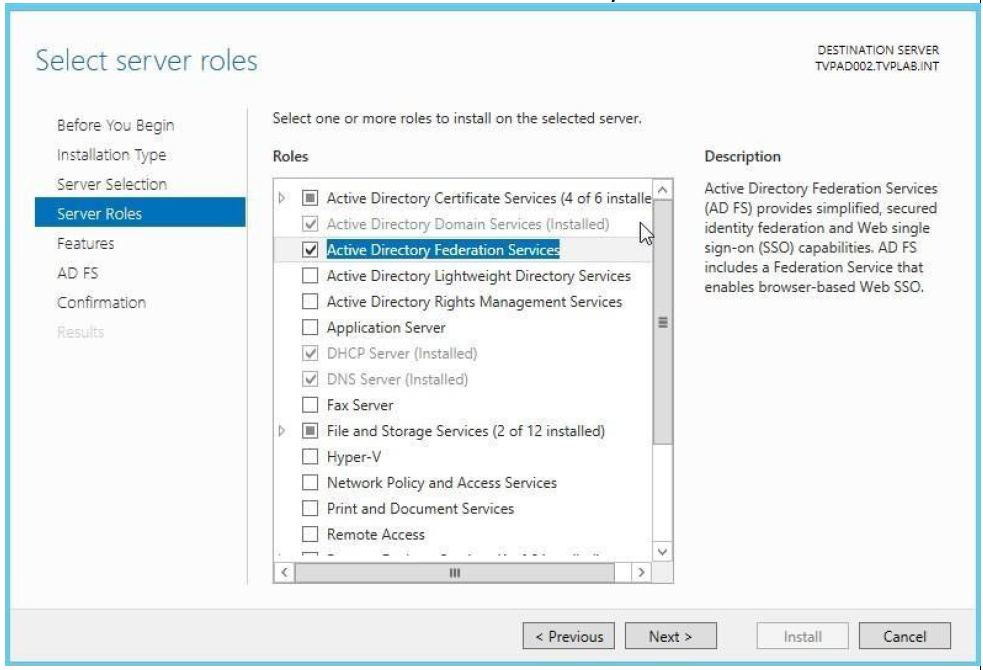
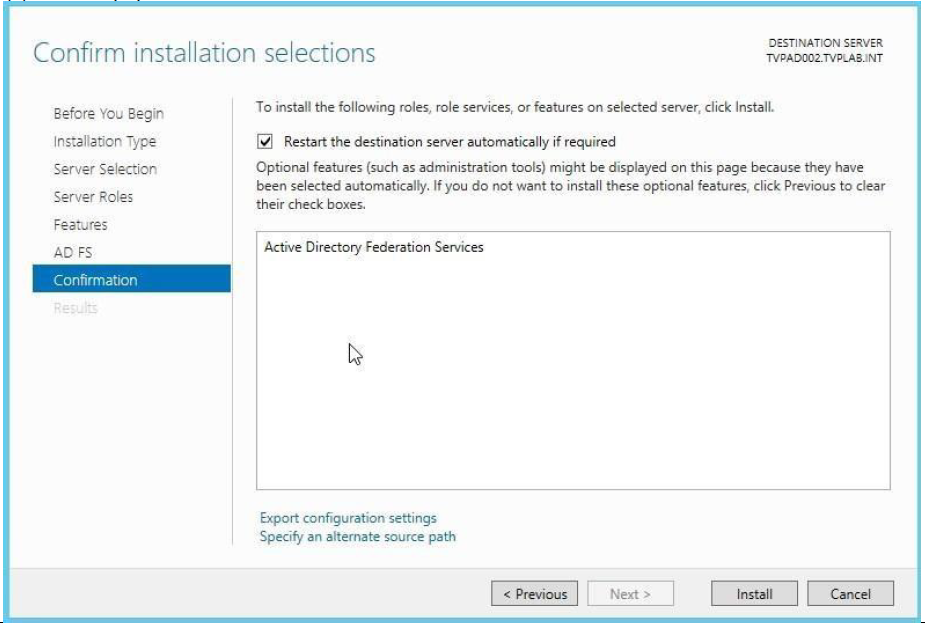
Select the server for the install and click Next. Then select Active Directory Federation Services. Click Next.
-
Click Next through the Server Roles, AD FS and then to the Confirmation screen. Check the box for Restart, say Yes to the next screen, and click Install.
-
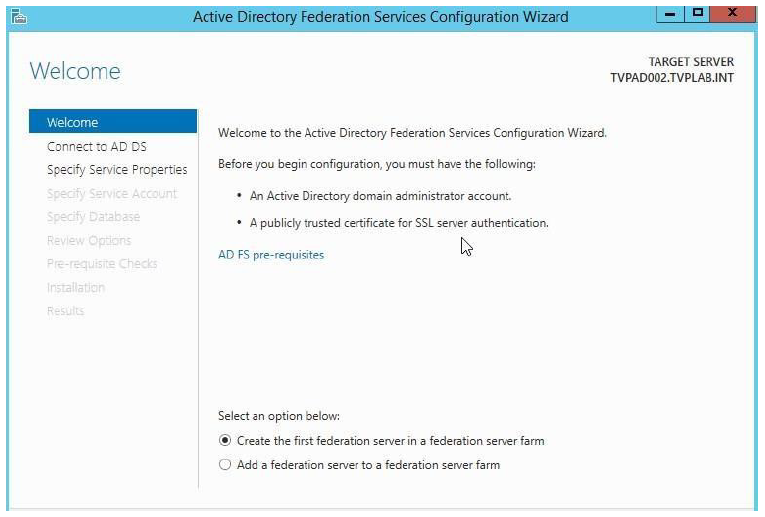
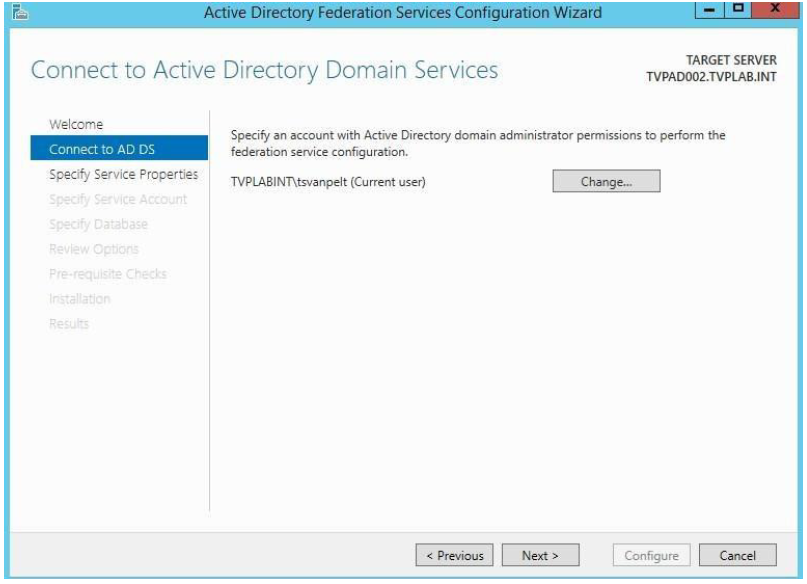
Once ADFS is installed, you must complete a post deployment activity if this is the first AD FS server in Active Directory. Use your own configuration information for this step.
Setting up ADFS 3.0
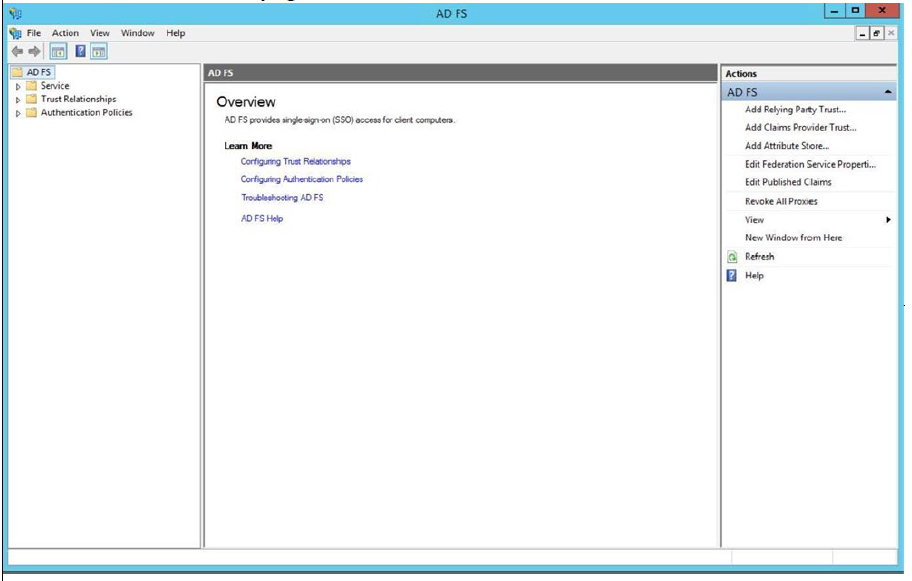
- In the ADFS 3.0 management console, start the Configuration Wizard.
-
When the wizard starts, select Create a new Federation Service and click Next.
-
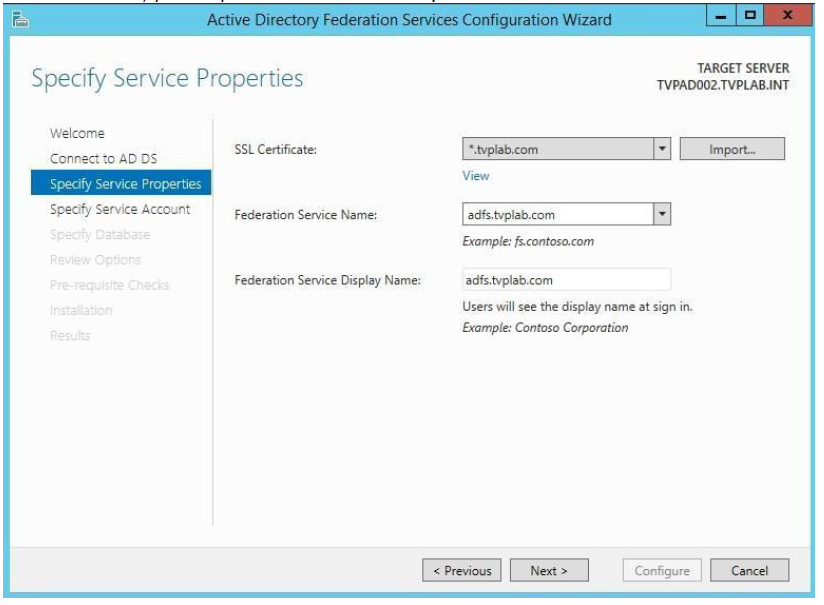
Since we use a Wildcard Certificate, we must determine a Federation Service Name. If you are not using a wildcard SSL cert, you might not have to do this step. Then click Next to continue.
-
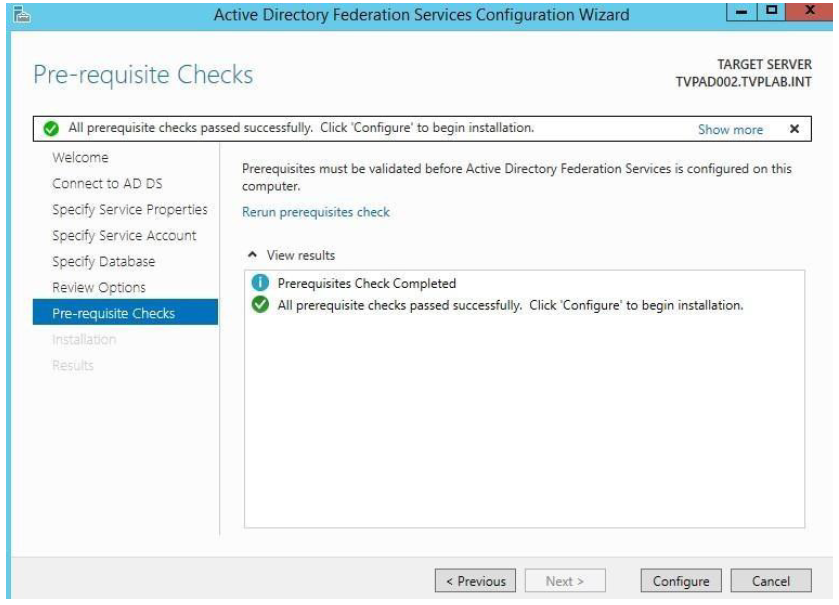
Click Next to configure.
-
Confirm that all the configurations were finished without error and click Close and exit the wizard.
-
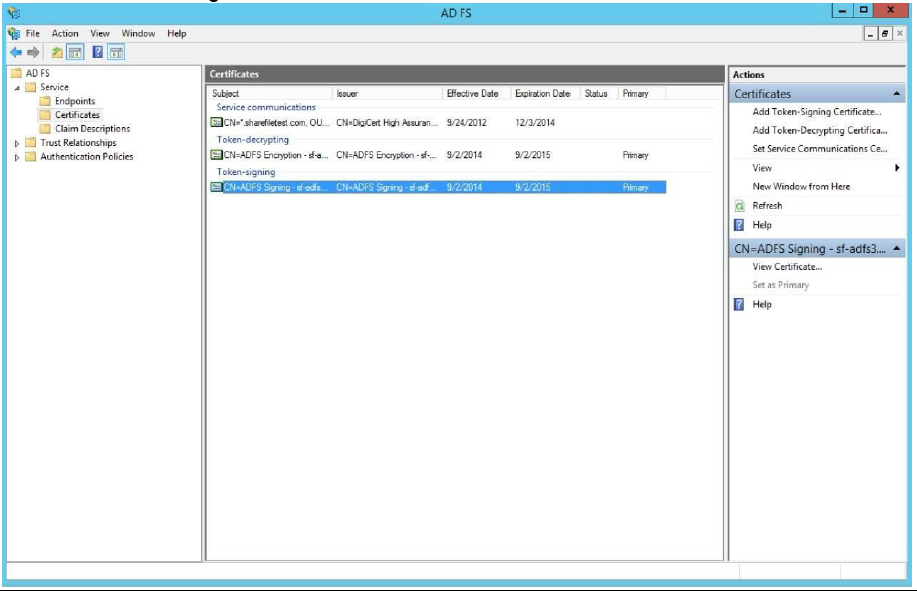
Expand the Service node in the Management Console. Select the Token Signing certificate and click View Certificate in the right-hand column.
-
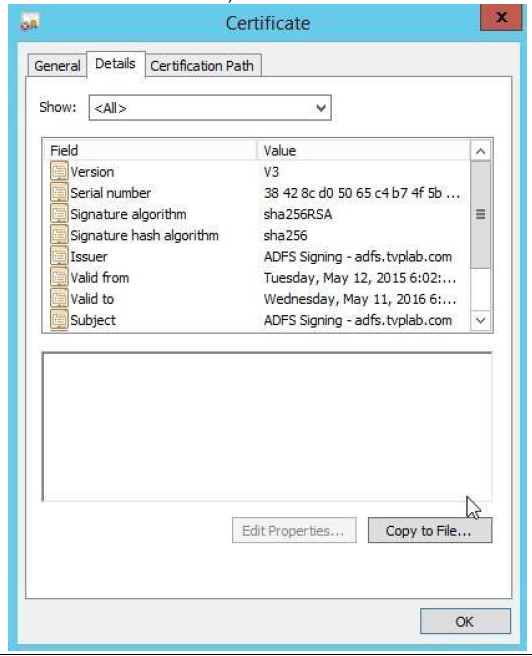
In the Certificate window, select the Details tab and then click Copy to File.
-
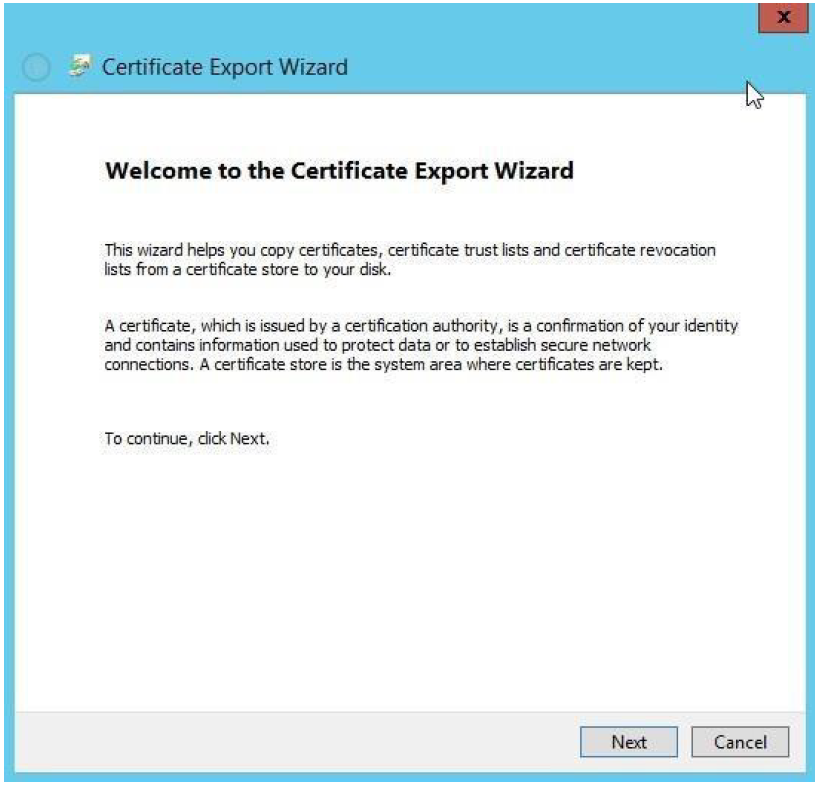
Click Next to continue.
-
Select Base-64 encoded X.509 (.CER) as the export format for the certificate, then click Next.

-
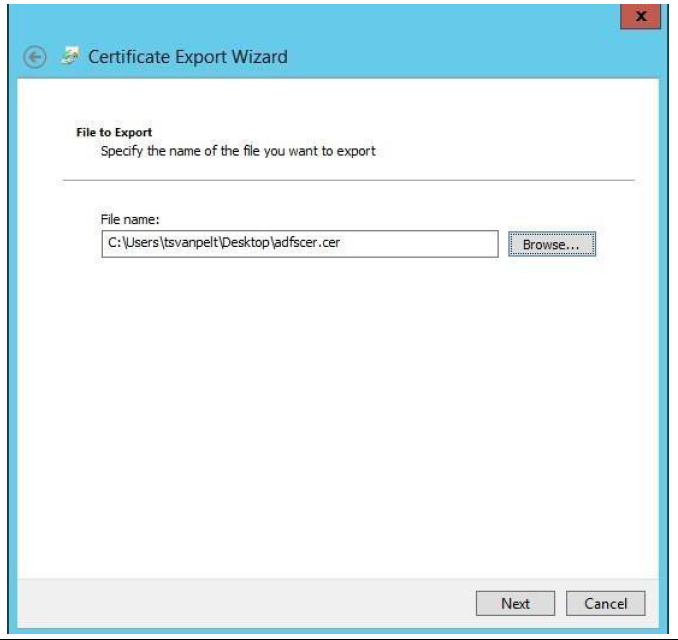
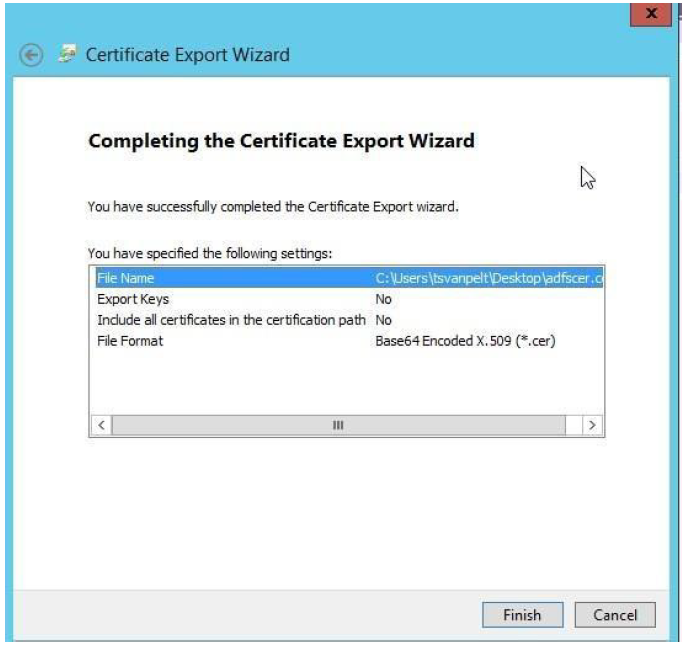
Save the certificate file and click Next.
-
Click Finish to save the file.
-
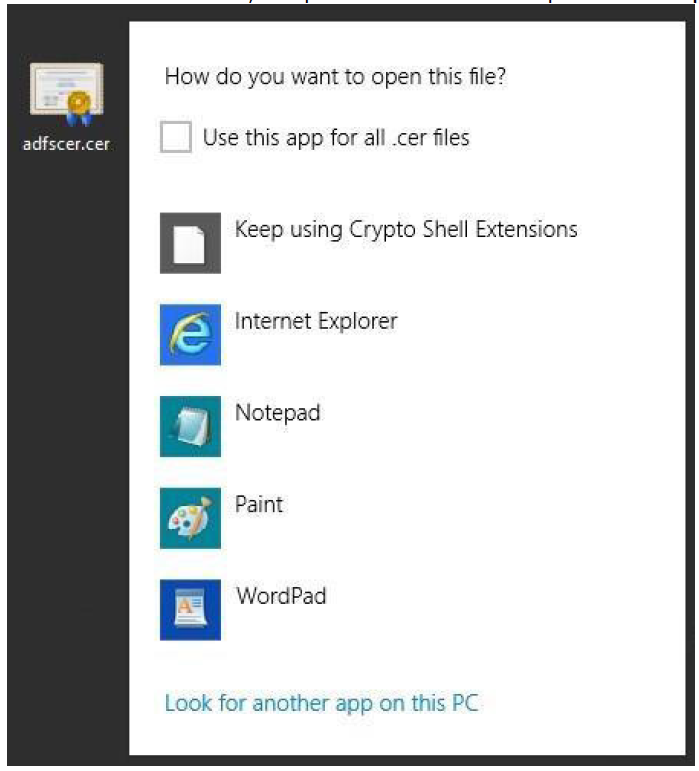
Browse to the folder where you exported the certificate and open it with Notepad.
-
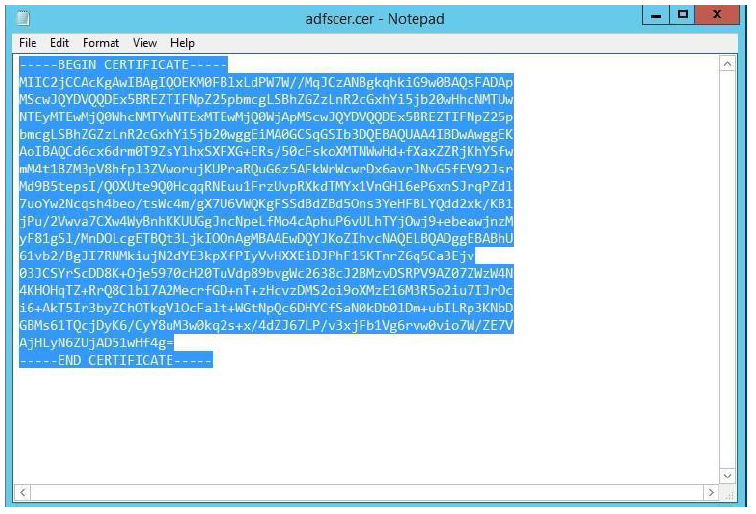
Select all the text inside the Notepad and copy.
- Open Internet Explorer and go to your Citrix Content Collaboration account (
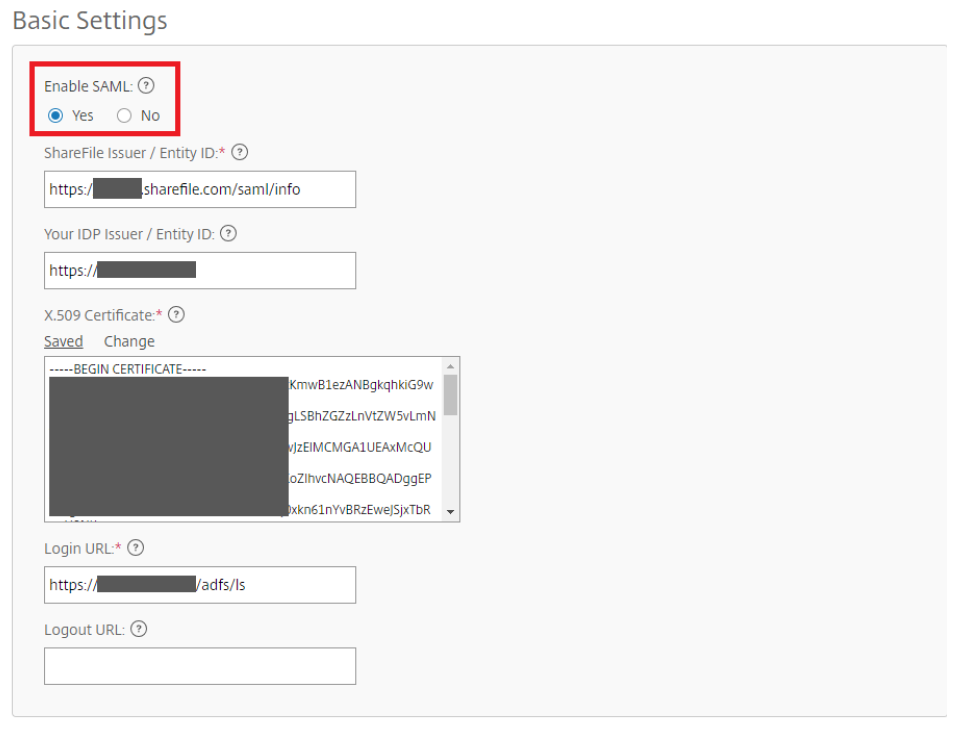
https://<yoursubdomain>.sharefile.com). Sign in with your administrator account. Navigate to Admin Settings > Security > Login & Security Policy. Find Single sign-on / SAML 2.0 Configuration.- Switch Enable SAML setting to Yes.
-
ShareFile Issuer / Entity ID:
https://<subdomain>.sharefile.com/saml/info -
Your IDP Issuer / Entity ID:
https://<adfs>.yourdomain.com - X.509 Certificate: Paste the contents of exported certificate from previous section
-
Login URL:
https://<adfs>.yourdomain.com/adfs/ls
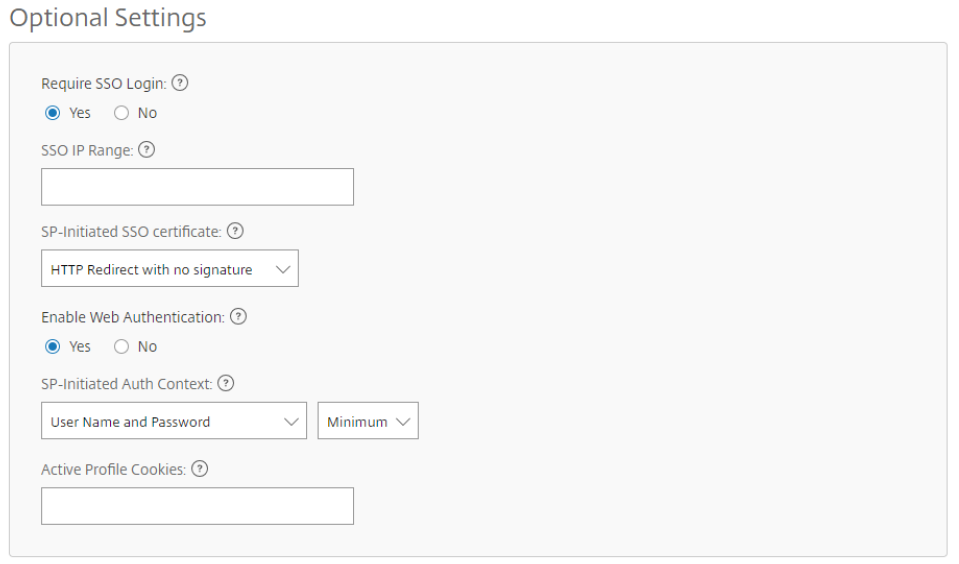
- In Optional Settings, change the following values.
- Enable Web Authentication: Yes (Check marked)
- SP-Initiated Auth Context: User Name and Password – Minimum
-
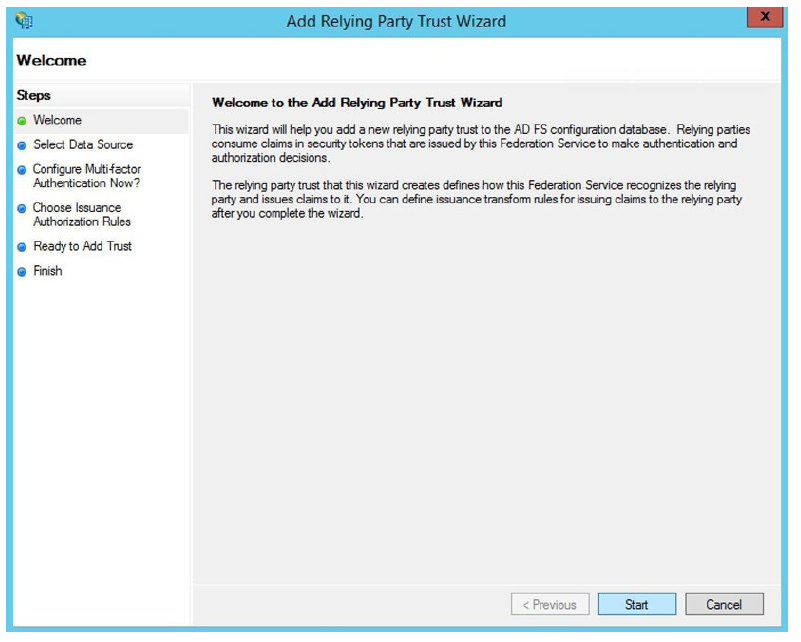
Minimize Internet Explorer and return to the ADFS Management Console. Expand the Trust Relationships node and select Relying Party Trusts. Then click Add Relying Party Trust… from the right-hand side of the console. This launches the Add Relying Trust Wizard.
-
Click Start to begin specifying a Relying Party Trust.
-
Retrieving the metadata from the SAML site can configure the trust automatically for you. Use
https://<yoursubdomain>.sharefile.com/saml/metadataas the federation metadata address (host name or URL). Click Next.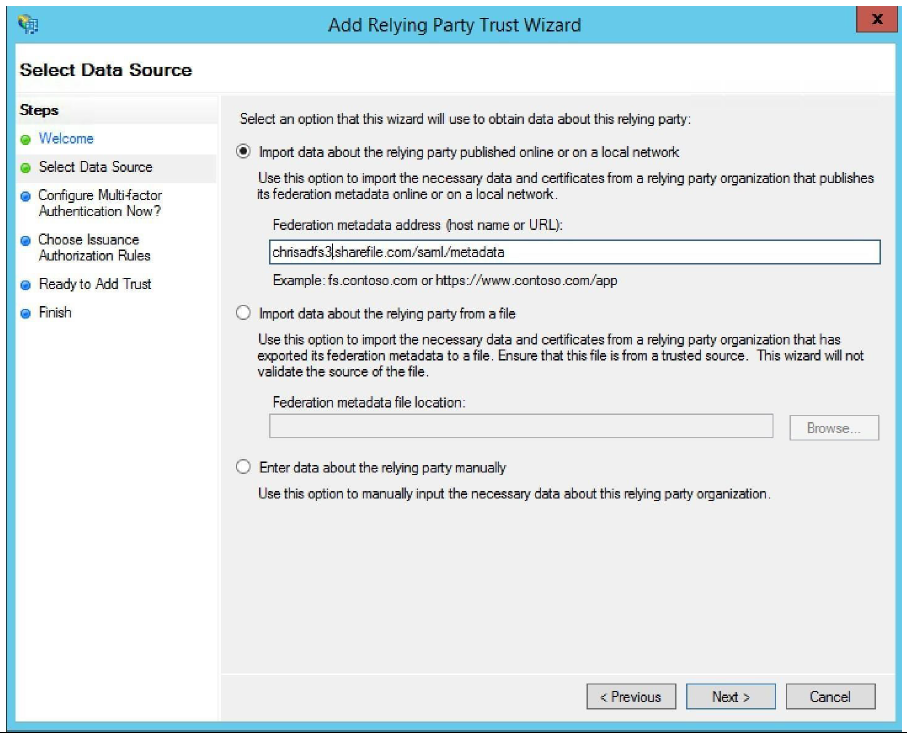
-
Specify a Display Name. Typically you keep this as
<yoursubdomain>.sharefile.com, so you can identify the different trusts from each other.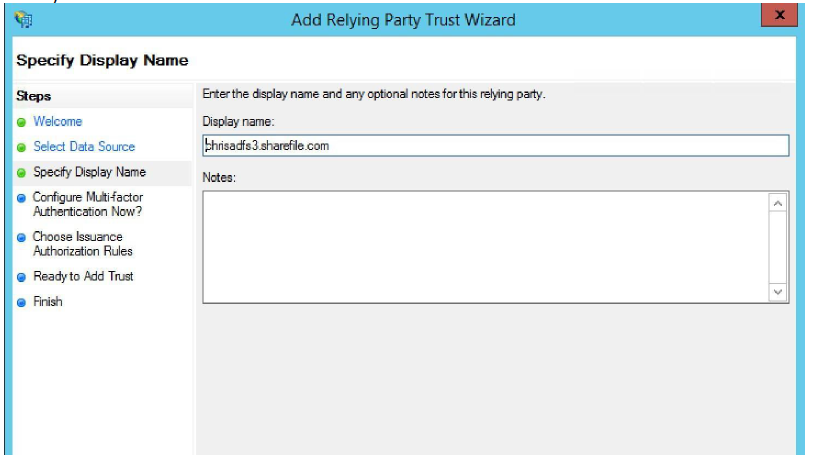

-
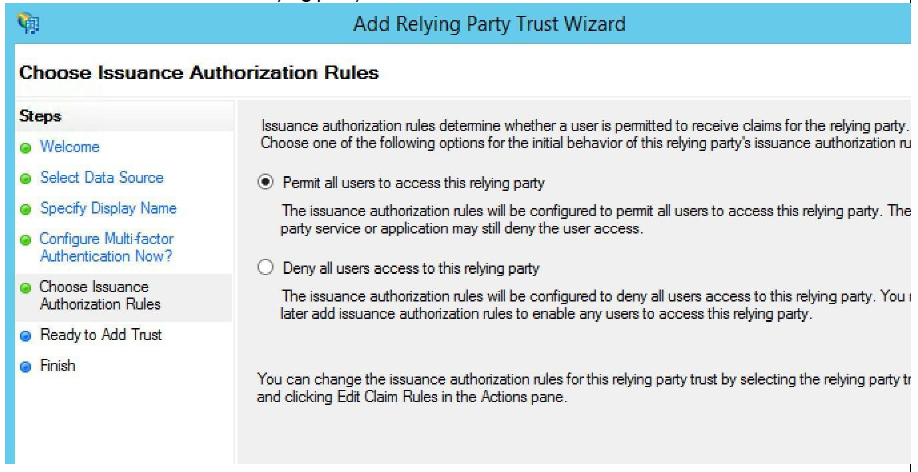
Permit all users to access this relying party. Click Next.
-
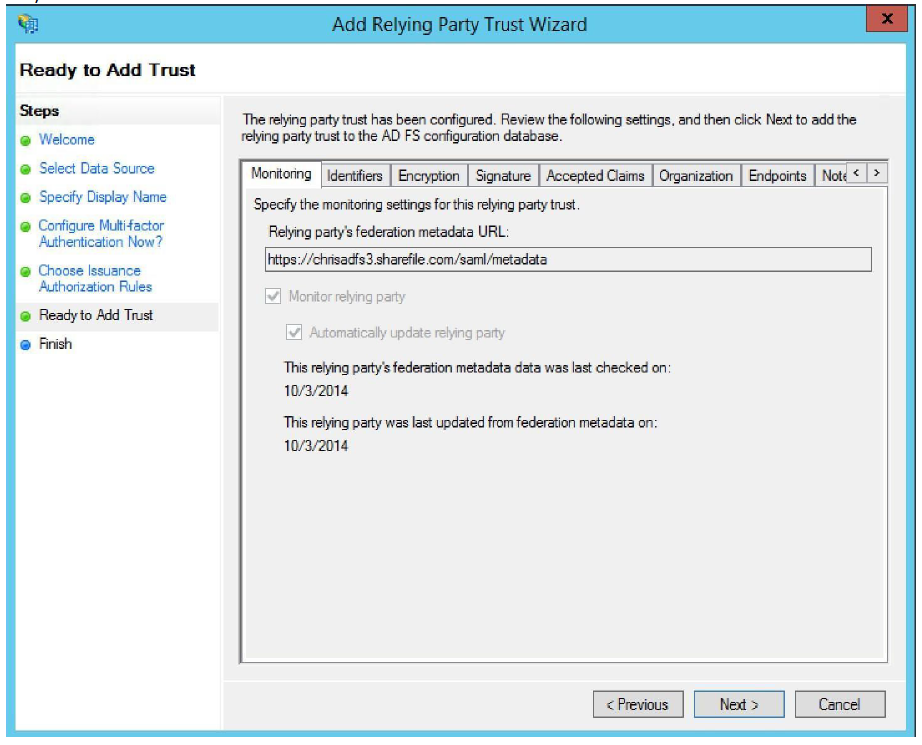
Verify that the information is correct and click Next.
-
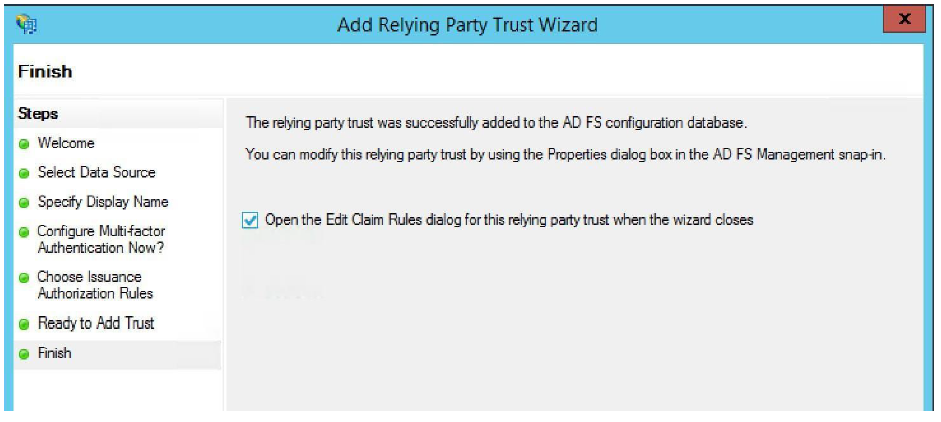
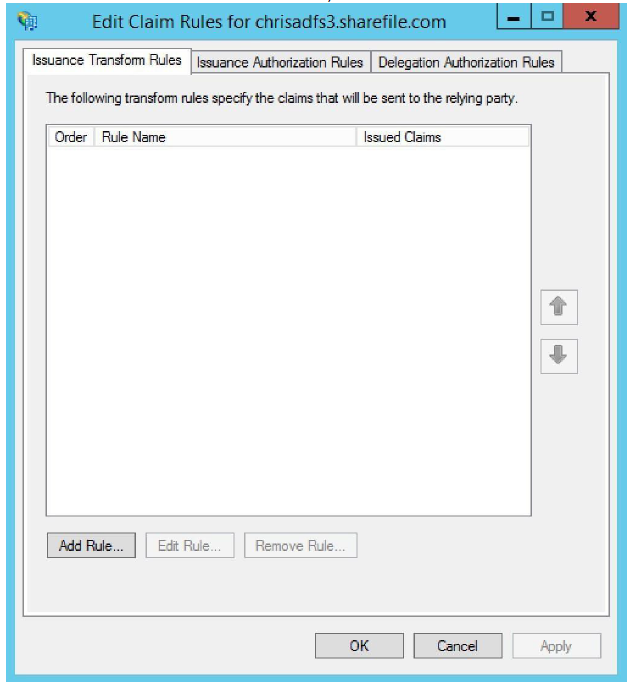
Verify that the check box for Open the Edit Claim Rules dialog for this relying party trust when the wizard closes is checked. Then click Close.
-
On the Issuance Transform Rules tab, click Add Rule.
-
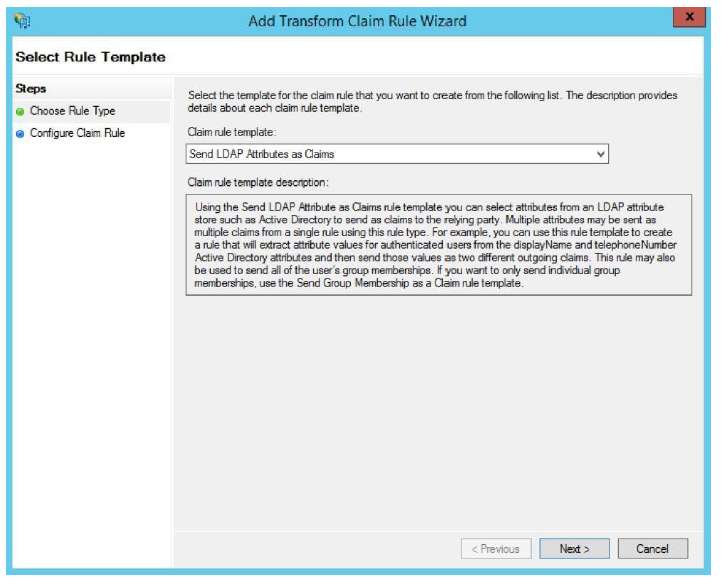
The first rule is to Send LDAP Attributes as Claims.
-
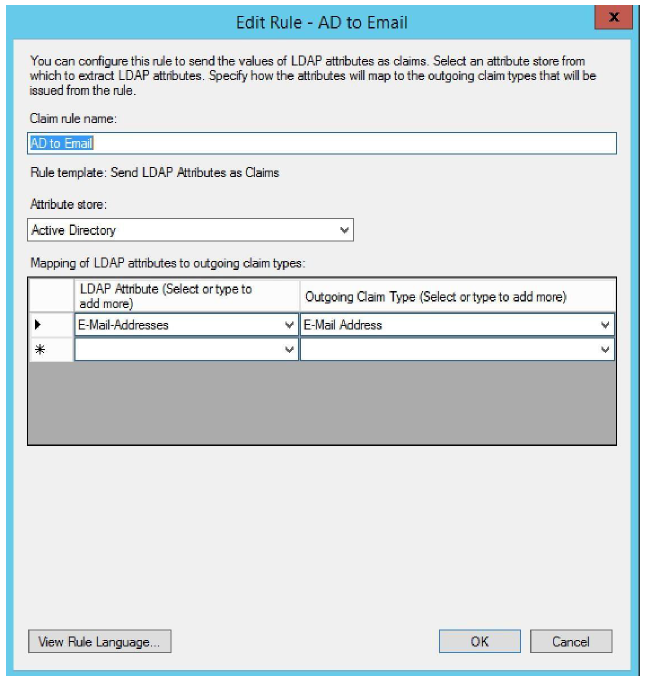
Users in the Citrix Content Collaboration platform are identified by their email address. We send the claim as a UPN. Give a descriptive Claim rule name, such as E-mail Address to E-mail Address. Select Active Directory as the attribute store. Finally, select E-Mail Address as the LDAP attribute and E-mail Address as the Outgoing Claim Type. Click Finish.
-
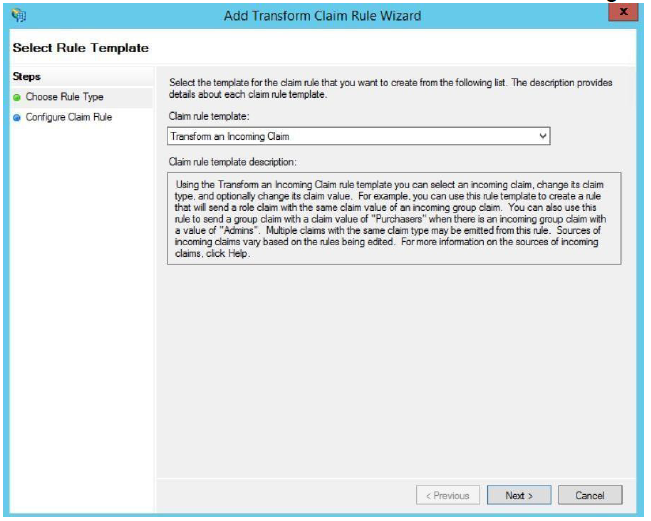
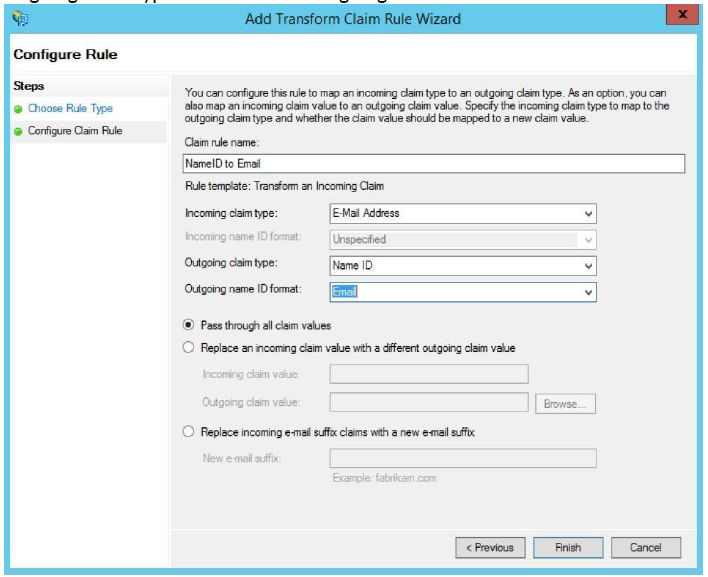
Create a second rule. This rule is used to Transform an Incoming Claim. Click Next.
-
The incoming claim type transforms the incoming email address to an outgoing Name ID claim type in the email format. Give a descriptive name, such as Named ID to E-Mail Address. The Incoming claim type is Email Address, the Outgoing claim type Name ID. The Outgoing name format is Email. Click Finish.
-
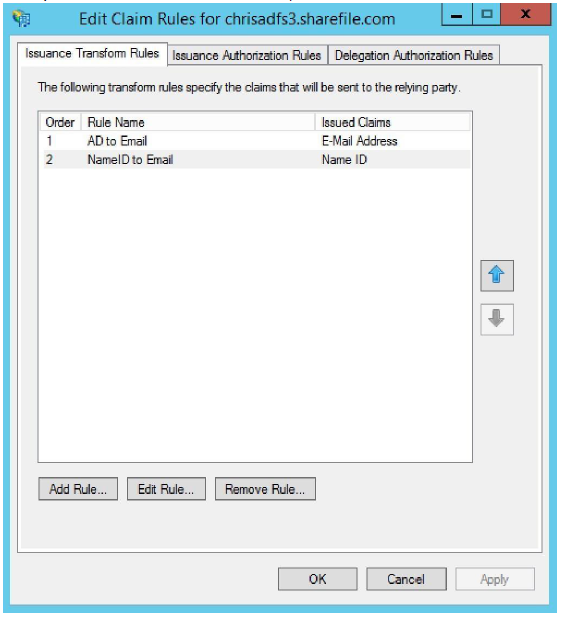
Verify that the claims are correct, then click OK.
-
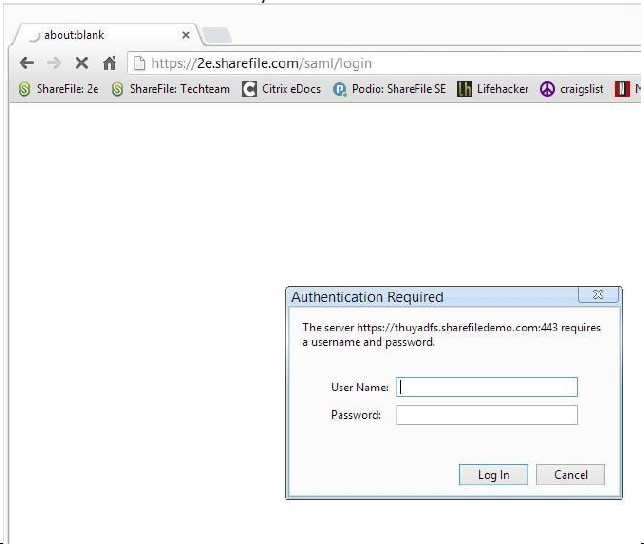
Switch to any web browser and navigate to
https://<yoursubdomain>.sharefile.com/saml/login. You are redirected to your ADFS services. If your sign-in email is linked to a user on AD, then you are able to authenticate with your AD credentials.